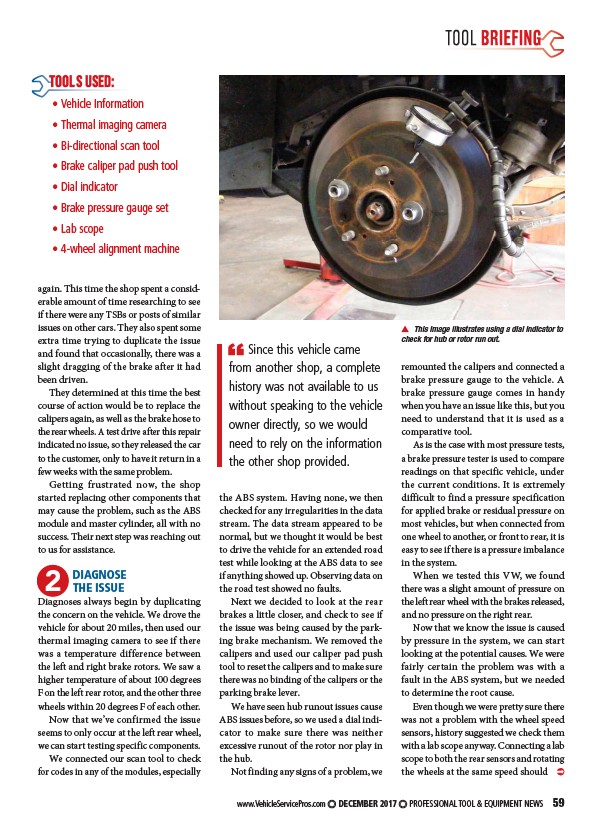
This image illustrates using a dial indicator to
check for hub or rotor run out.
www.VehicleServicePros.com DECEMBER 2017 PROFESSIONAL TOOL & EQUIPMENT NEWS 59
TOOLS USED:
• Vehicle Information
• Thermal imaging camera
• Bi-directional scan tool
• Brake caliper pad push tool
• Dial indicator
• Brake pressure gauge set
• Lab scope
• 4-wheel alignment machine
again. This time the shop spent a considerable
amount of time researching to see
if there were any TSBs or posts of similar
issues on other cars. They also spent some
extra time trying to duplicate the issue
and found that occasionally, there was a
slight dragging of the brake after it had
been driven.
They determined at this time the best
course of action would be to replace the
calipers again, as well as the brake hose to
the rear wheels. A test drive after this repair
indicated no issue, so they released the car
to the customer, only to have it return in a
few weeks with the same problem.
Getting frustrated now, the shop
started replacing other components that
may cause the problem, such as the ABS
module and master cylinder, all with no
success. Their next step was reaching out
to us for assistance.
2 DIAGNOSE
THE ISSUE
Diagnoses always begin by duplicating
the concern on the vehicle. We drove the
vehicle for about 20 miles, then used our
thermal imaging camera to see if there
was a temperature difference between
the left and right brake rotors. We saw a
higher temperature of about 100 degrees
F on the left rear rotor, and the other three
wheels within 20 degrees F of each other.
Now that we’ve confirmed the issue
seems to only occur at the left rear wheel,
we can start testing specific components.
We connected our scan tool to check
for codes in any of the modules, especially
the ABS system. Having none, we then
checked for any irregularities in the data
stream. The data stream appeared to be
normal, but we thought it would be best
to drive the vehicle for an extended road
test while looking at the ABS data to see
if anything showed up. Observing data on
the road test showed no faults.
Next we decided to look at the rear
brakes a little closer, and check to see if
the issue was being caused by the parking
brake mechanism. We removed the
calipers and used our caliper pad push
tool to reset the calipers and to make sure
there was no binding of the calipers or the
parking brake lever.
We have seen hub runout issues cause
ABS issues before, so we used a dial indicator
to make sure there was neither
excessive runout of the rotor nor play in
the hub.
Not finding any signs of a problem, we
remounted the calipers and connected a
brake pressure gauge to the vehicle. A
brake pressure gauge comes in handy
when you have an issue like this, but you
need to understand that it is used as a
comparative tool.
As is the case with most pressure tests,
a brake pressure tester is used to compare
readings on that specific vehicle, under
the current conditions. It is extremely
difficult to find a pressure specification
for applied brake or residual pressure on
most vehicles, but when connected from
one wheel to another, or front to rear, it is
easy to see if there is a pressure imbalance
in the system.
When we tested this VW, we found
there was a slight amount of pressure on
the left rear wheel with the brakes released,
and no pressure on the right rear.
Now that we know the issue is caused
by pressure in the system, we can start
looking at the potential causes. We were
fairly certain the problem was with a
fault in the ABS system, but we needed
to determine the root cause.
Even though we were pretty sure there
was not a problem with the wheel speed
sensors, history suggested we check them
with a lab scope anyway. Connecting a lab
scope to both the rear sensors and rotating
the wheels at the same speed should
Since this vehicle came
from another shop, a complete
history was not available to us
without speaking to the vehicle
owner directly, so we would
need to rely on the information
the other shop provided.
/www.VehicleServicePros.com